Tuesday, May 19, 2009

Growing Pepper Plants from seed

Pepper plants can be started from seed, beginning around March indoors. The plants can then be planted outside in the garden in mid to late May. Pepper seeds can be stated in many types of containers, such as seed flats or small cups. This years our pepper plants were started in a seed flat in a sunny window. Peppers love heat and the environment on the window sill helped the seeds to germinate. As soon as the seedlings emerged, we transferred them to cups to allow more room for growth. The seedlings were then moved to our growing light station.

We use the growing light station at this point because, if the seedlings were left on the windowsill there would not be enough light for good growth and the plants would become leggy or too elongated and thin. The growing light station consists of a standard shop light and a small platform with a height adjustment rack that holds the shop light, which can be raised or lowered very easily. The wood for the platform came from scraps of wood, left over from some of my jobs as a handyman.

In the first photo the pepper seedlings in the growing light station are shown. In the second photo the seedlings are outside ready to be planted in the garden.


Photobucket

Photobucket

Friday, May 15, 2009

Broccoli

Having a square foot garden is a good project for everyone. Raising your own vegetables takes a little time, but it is well worth the effort. This year we are growing broccoli, swiss chard, kale, tomatoes, peppers and potatoes. We also have some permanent beds of two varieties of mint.

Having a vegetable garden is a natural pastime for a handyman. The Photos show the broccoli plants in our garden.


Photobucket

Photobucket

Monday, May 11, 2009

Repairing Rotted Wood

Many homes in have problems with rotted wood. As a handyman I see a variety of exterior rotted wood in many of the homes.

In the photos, you can see the rotted area in the front of this home. Insects and birds had been attracted to the hole and the homeowner contacted me to do the repairs. My son, Jim helped me on this job.The first photo was taken before we even put up a ladder to begin the repair. Once we started to inspect the damage, we found that the wood was very soft and we had to remove all of the rot and cut the area back to find good wood.

In the second photo , you can see that we fitted new wood to the area, that was cut out. We secured the new wood and filled in a few small spots, then sanded the area. The adjacent wood was prepared and after that primer and caulk was applied.

The third photo was taken while the top coating of paint was still drying. Our goal was to make the completed repair look as though the damage never happened.


Photobucket


Photobucket

Photobucket

Sunday, May 10, 2009

Antique Wrench "Trimo" - Trimont Mfg.

Here is a photo of a wrench that was owned by my father. My son Jim and I have a few antique tools and this is our favorite. It is a 12" wrench made by Trimont Manufacturing . You can clearly see the patent date that is stamped on the wrench. That date was December 19, 1911.

Trimont Manufacturing was founded in July, 1889. The original founders were Alfred, Charles and Edward Ely.From what I have read, the company stopped making wrenchs in the 1940's. The company was located in Roxbury, Ma.

My father and my uncle were partners in a plumbing & heating business for many years. This wrench has seen many years of use and is still in very good condition.My son and I continue to do some plumbling as part of our handyman business.


Photobucket

Thursday, May 7, 2009

Ceiling, Window, and Wall Repair

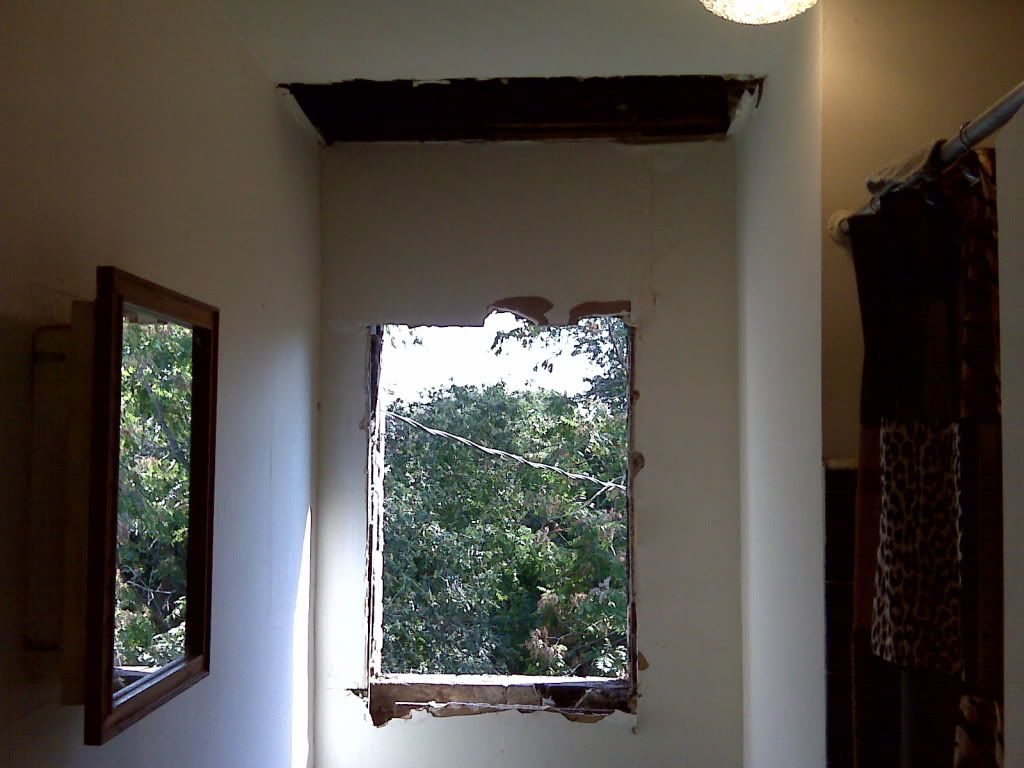
A home had damage to the ceiling, window and wall of the upstairs bathroom. Water had leaked in over a long period of time from the roof and upper exterior wall. After the area of the outside leak was fixed, the interior damage was ready to be repaired.

I began by cutting out an area in the ceiling that was damaged. There was a small amount of old insulation that was no longer useful, so I removed that along with the rotted wood. Next, I took out the old window and window frame and removed all rotted material from the wall in the area of the window.

Once the demolation was finished, it was time to start the repairs. In the ceiling I replaced the wood and added insulation. The home owners told me that the room was always cold in the winter, so I added a good amount of insulation. This new insulation is a big improvement over the small amount of insulation that was there before. Then I installed a new piece of sheetrock in the ceiling and began taping and finishing. New window framing and a new window were added to the room. Window trim and wall repairs were done after the wall was insulated.

In one photo you can see the wall and ceiling after demolition of the damaged and rotted materials. The other photo was taken after most of the repairs were completed, but before final joint compound finishing, touchup and priming and painting.

Other jobs at this home included replacing an exterior wooden door, and installing a handrail on the front steps.


Photobucket


Photobucket